Tuesday, 30 April 2013
UDK
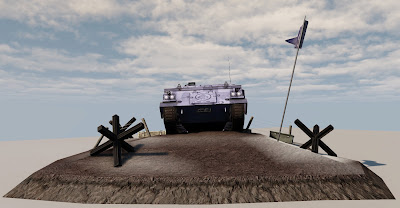
Finally here are my renders from UDK. I decided to go with midday map, just lowered a brightness a bit to create more dramatic look. I think this lighting suits my diorama the best.
Diorama textures
Here is my diorama in Maya, fully textured.
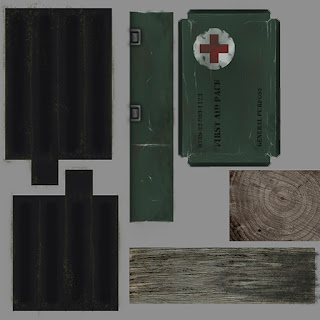
Diffuse and Normal maps. All normal maps been made with xNormal from bw images by using Leavon's technique. When I needed more depth I just changed the mode to 16 bit and overlayed the normal map few times with a bit of gaussian blur. For wood textures I used a bit of surface blur on the bw image before converting to normal map to avoid to noise.
Barricades+ med kit
Flag+ weapon box
Ground edge+ spiked wire
Ground
Snow texture for vertex painting
Diorama
Here is my diorama fully modeled and unwrapped.
Barricades + med kit UVs
Barricades + med kit UVs
Barricades Lightmap
Flag+weapon box UVs
Flag lightmap
Ground and ground edge UVs.
My diorama consists of less than one 1024x1024 texture. Here is my split up, 5 textures in total if counting texture for vertex painting.
Texturing
My base texture for FV432. I used Difference Clouds and then played with filters.
Clouds->pixelate (or crystalize for more round look)->Cutout->Water Paper or Sprayed Strokes.
Clouds->pixelate (or crystalize for more round look)->Cutout->Water Paper or Sprayed Strokes.
Base iron texture for tank treads.
Everything else was matter of painting scratches,dirt,some decals and material shift by changing values.
Normal Maps
For Normal maps I first created all the high poly bits that I needed and then baked them to the plane.
To help me place all the normals in the right place I mainly use AO map, in the beginning my normal map resolution was 2048 and then I resized it to 1024 with bicubic sharper mode.
I also made normal to cavity conversion in xNormal filter.
UVs
In this project I've used a lot of overlapping UVs. It worked this time, but I need to be more careful in future. The obvious advantage of this technique is UV space saving, on the other hand there are 2 minuses, 1- loss of variation (doesn't really matter for parts that not suppose to draw attention) 2- lots of seams, works especially bad with UDK.
Example of how UVed smaller wheels that almost not going to be seen.
Friday, 1 March 2013
Finished Low-poly block-out.
So here is my finished block-out .
Side view.
Side view.
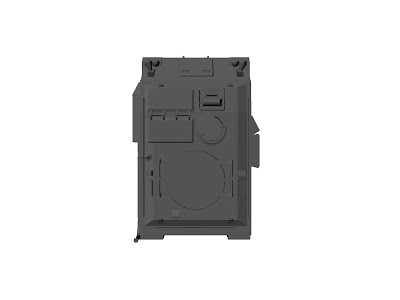
Front view.
Back view.
Top view.
3/4 wireframe view.
I decided to use my poly budget this way ( 8500 for model 1500 for diorama) because otherwise I would lose many nice details on the actual model, and the model is the main object of attention, diorama is suppose to support the model. I think I will be able to pull out diorama with 1500 tris, I am thinking about the winter theme. There are still a lot of details to be added with normal maps.
Thursday, 28 February 2013
Beginning
First of all I set two planes with front and side view of FV432 and UDK man to get my proportions right.
When I finished blocking out the basic shape I changed my blueprints to photos.
I had some real trouble with the pipe. I was trying to model it at Uni but it was giving me some strange results. I used curve+extrude technique for it and it was alright on the outside but inside it was giving star-shape faces. But when I tried doing same thing at home everything worked well, so I don't know what was the problem.
My second problem was that I set Extrude Tool to 5 divisions and forgot to set it back to 1. As a result every time I extruded something I was getting much more faces than I expected, I thought it was some kind of glitch and was just manually deleting nasty edges and faces...lost so much time.
Like here, simple box but 192 Tris and that nasty edge/face. At least now I know what is the cause and how to fix it.
Considering Wheels I decided to make holes and bold on normal map so I created nice curved in surface, I think normals will look good on it.
I was struggling with the front wheel, wasn't sure hot to make teeth on it because I was almost out of polygons. Matt suggested making plane faces to save poly-count and it worked really well I think.
Here is the weird thing that was in front of FV432. It has some holes in it but not all the way through the armor. On one fancy FV432 I saw torch lights put in it, however I am not sure if that is correct use for it.
I made the overall shape and decided to make holes illusion with normal+specular maps to save some polies.
For my handles I used three-sided polygons and was actually surprised that it looks really well, this is because they are very thin, the thinner is pipe the less divisions it need.
Subscribe to:
Comments (Atom)


.jpg)


